Since I always forget, this is the command for formatting double density floppy disks on Windows:
1
| |
Since I always forget, this is the command for formatting double density floppy disks on Windows:
1
| |
Using Spotify Linux Preview, I want to open URIs to songs and playlist from Opera. This was not working, so here is how you fix it:
Stick the following in a file:
1 2 | |
Make it executable with chmod +x
Go to Opera preferences by pressing Alt+P or Ctrl+F12, then go to Advanced, Programs, press Add, in Protocol, enter spotify and put the path to the script in Open with other application. Now you can open all the playlists!
There is a lot of data I need to extract from archives, nested deeply within a silly folder structure. Doing it manually is out of the question. I had to modify this script I found at the Unix Stack Exchange slightly, in order to make it run as I wanted. It will run until it doesn’t find more .zip archive files, as it deletes them after extraction.
I put this into a file:
1 2 3 4 5 6 7 8 9 10 11 12 13 | |
then made it executable with chmod +x and stuck it on my path. Now I can easily unzip all the archive files recursively, from the folder where I call the script.
As I recently installed Debian on my main workstation, I wanted to make my beloved E-MU 1820 sound card work. The audio quality is much better than the integrated sound card on the motherboard, probably because of better digital-analog converters and more power to drive my headphones. The sound card did not work out of the box, so I had to start poking for data. We can get useful hardware information using lspci.
1
| |
This gave a lot of output, so I used grep to find my sound card.
1
| |
gave the following:
1
| |
Notice the 1102:0004, which is the PCI id. Next I looked it up in Debians device database: http://wiki.debian.org/DeviceDatabase/PCI Strangely it did not match completely, closest find in the database was 1102:7004. The output led me to search for debian 1102:0004, which gave just what I needed: a handy guide to compile and install the driver from scratch. Follow the guide and be on your way: http://wiki.debian.org/snd-emu10k1 When using sudo, I have to qualify modprobe to /sbin/modprobe. If you are elevated by su, you can call modprobe directly.
Upon completing the guide, I restarted my system and was able to get the sound working by poking around in the Alsa mixer. I had to select the correct hardware and output settings. To change the default card we can modify the alsa.conf or alsa-base.conf (depending on what you have present) in /etc/modprobe.d/
List your sound cards with:
1
| |
Append alsa.conf or alsa-base.conf with:
1
| |
After rebooting the system, the clock rate had reset from 44.1Khz to 48Khz. This made the sound distorted. To fix it, set the clock rate with the following command:
1
| |
Notice that -c 1 corresponds to the sound card from /proc/asound/modules. Just add this command to /etc/rc.local to run it upon login. You must add the command before the exit 0, as that must be the last command in the file. This will ensure that the clock rate is set to 44.1Khz every time you log in.
Lastly, I want to mention a useful tool for poking around with the routing matrix: emutrix. In the end, I did not need this tool to playback audio. However, if you are doing recording, it seems very useful to work out the routing. There are detailed installation instructions here: http://code.google.com/p/emutrix/wiki/InstallGuide Just make sure you check it out from the svn-repo, as the releases does not support multiple sound cards (which every motherboard has this these days (increasingly on graphics card too, through HDMI)).
Update 31th August
Using emutrix, I poked around a bit to fix output to my loudspeakers. Only headphones was working previously. Thanks to emutrix, it was very fast and simple to determine the routing, before writing the commands. I now have this in my rc.local as well:
1 2 3 4 5 6 7 8 | |
Regarding my last recommendation for Ubuntu and Keepass, there is now a much simpler option: a ppa-repository. Installation now only requires 3 commands, and no fiddling with setting up a script to launch the .exe-file with mono.
1 2 3 | |
Alt+F2, keepass2, Enter, and be on your way. In my experience, this also much more stable than running Keepass with mono. This is quite old news and more accessible than my last post on the matter, as this information is linked to from the main Keepass site.
Update 2nd September 2011: It seems I forgot to write how to configure gnome-terminal to keep the original title. In Profile Preferences go to Title and Command and set When terminal commands set their own titles to Prepend initial title.
Stumpwm is an excellent tiling window manager written entirely in Common Lisp. It is fully keyboard driven and hackable to the fullest. The wm is running in it’s own CLisp REPL, so you can connect with Slime+Emacs and hack directly. It is super easy to customize the wm, simply re-evaluate and you are good to go!
cmus is an equally awesome program I enjoy using, a very efficient music player that runs in a terminal emulator.
I wanted to have a keybinding either bringing cmus in focus, or starting it if it isn’t running. As cmus is running in a terminal emulator, it wasn’t straight forward how to achieve this. I am using the Gnome Terminal, so this solution will have to be modified to work with other terminals. Of course, the code is added to the .stumpwm file, but you could also just evaluate it to try it out.
1 2 3 4 | |
Now I just have to bind the command to an appropriate key
1
| |
This works because I set the title of the terminal when I launch it. cmus changes the title based on what song is playing, so it will not work without doing this.
I love the new version of the Opera web browser. If my memory is correct (it sometimes is) I have been using Opera for about 8 years. They do like to change things up, innovate and think differently. This is often for the better, giving us new and exiting features, for instance the Speed Dial. They changed up a lot of things for version 11, but there is one change I did not like: hiding the URL parameters.
I found a solution for this problem in the opera.beta newsgroup, and it is dead simple: enter opera:config#UserPrefs|HideURLParameter in the address bar, uncheck the highlighted field and press save in the bottom. Done. Now URLs will not be truncated in the address bar!
Update 26th August 2011: Solution tested and working with Debian Squeeze (my new main distro). A commenter reported it works on Mint, so I guess it works on most Debian-based distros. Another commenter had success on a Gigabyte motherboard, which is very interesting indeed.
After 3.5 years I finally caved in and got a new laptop. Screen resolution, lagging editors and general sloppyness where the major factors for ditching the old one. I have been quite pleased with the quality on my ASUS eeePC 1015PE, so I decided to go for another ASUS computer. As I am to use this machine for development, I’d like to have a large screen; the old one left me frustrated at the lack of screen estate and the crappy resolution. I therefore got me a 17,3″ ASUS N73JF, with enough power to last me just as long as the old one, I hope!
Since the new laptop has a somewhat decent graphics card, I decided to let the Windows install it came with stay, to be used for games and the likes. I of course installed Ubuntu 10.10 64-bit right away after booting the laptop to Windows 7 to check it out. It took longer booting to the preinstalled Windows 7, than it took installing Ubuntu from scratch! In addition to this, the Windows install was defiled with crapware. No wonder people buy Macs. Enough rambling; over to the problem at hand.
I did encounter a problem with getting the Suspend working in Ubuntu. After checking the fantastic ubuntuforums.org, I found people with similar issues. This thread holds the answers, but it seems the fix is more technical than it should be. However it will probably get included in some patch in the future.
At least for the N73JF, you need to create two files.
1 2 | |
To open a GUI editor like gedit, with root privileges, you can use the following command:
1
| |
Keep in mind this is dangerous if you edit the wrong files, so only open the ones we created with the touch-command. If you want to open the file directly, you can append the path to the filename onto the gedit command like so:
1
| |
When you have opened the files in your favorite editor, we need to enter some scripts. In 20_custom-ehci-hcd put in:
1 2 3 4 5 6 7 8 9 10 11 12 13 14 15 16 17 18 19 20 21 | |
In 20\_custom-xhci\_hcd put in:
1 2 3 4 5 6 7 8 9 10 11 12 13 14 15 16 17 18 19 20 21 | |
Now you must make these files executable with these two commands:
1 2 | |
A user on the forum reported he didn’t need the extra file as proposed in the first solution. I did not test without this file, as it wasn’t working until I added the xhci-related file. I suggest you try the steps outlined here first, and attempt these last steps only if it doesn’t work.
Make this file:
1
| |
Open the file, and put this in:
1 2 | |
He didn’t say if it needs to be executable, I’m assuming it should and that it couldn’t hurt:
1
| |
I hope you get it working. You should also check out the source for this post, as pointed out earlier. The forum might contain new information, after this is published.
There is a issue with KeePass in Ubuntu 10.10. As I had to fix this on several computers, I am posting the solution here. It was somewhat inconvenient to track down.
Run this command in the terminal:
1
| |
Earlier you only needed to install the winforms package to run KeePass, but with Ubuntu 10.10 it seems you need the system-runtime as well.
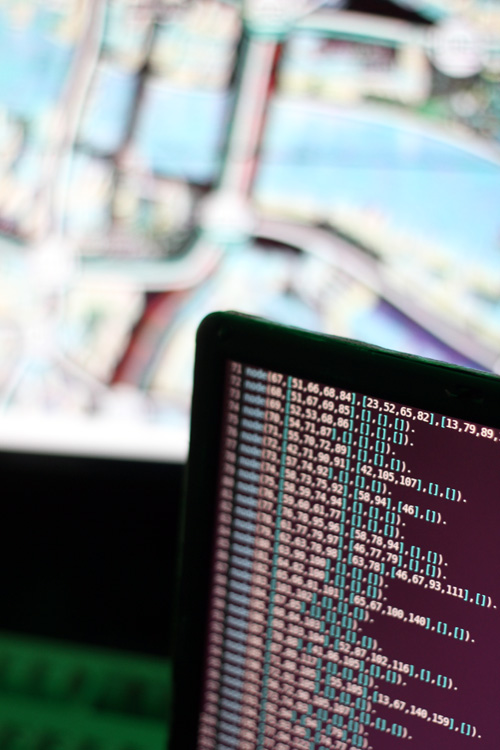
Photo by my wife, Matilde Skår
This I noticed when playing Scotland Yard with some friends during the summer. I figured I could make a helper program to remember and predict moves, and try to find ways to solve the game when Mr. X reveals his position. The programming language I am working in is Prolog, as it is very simple to represent the nodes in the graph with little syntax. The fun will start when I start writing predicates to search in the graph.